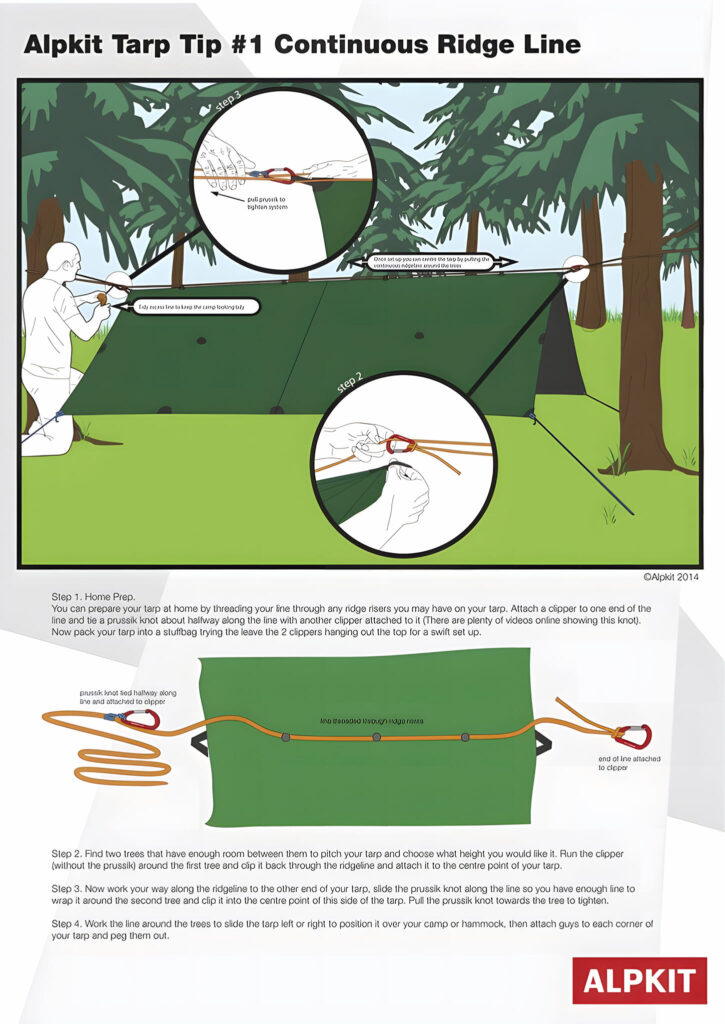

Alpkit Tarp Tip #1 – Continuous Ridgeline Setup

Step 1: Home Prep
Thread your ridgeline through the ridge loops or risers on your tarp (if it has them).
Attach a clipper (carabiner) to one end of the line.
Tie a prusik knot about halfway along the line with another clipper attached to it. This allows for adjustable tension later.
Pack your tarp and cordage into a stuff bag, leaving the two clippers visible for quick deployment.
—

Step 2: Attach to Trees
Choose two trees with appropriate distance apart and desired tarp height.
Take the end with the first clipper and wrap it around the first tree.
Clip it back through the ridgeline and attach it to the center point of your tarp.
—

Step 3: Tension the Line
Move to the other tree, wrap the ridgeline around it, and clip it into the tarp’s other center point using the prusik knot system.
Slide the prusik knot toward the tree to tighten the ridgeline.
—

Step 4: Final Adjustments
Walk the line around the trees to fine-tune the tarp’s position over your camp or hammock.
Once aligned, peg out each corner of the tarp and secure the guy lines.
—

Pro Tips
The prusik system lets you adjust and re-tension your tarp without untying.
This setup offers flexibility, speed, and secure shelter, even in rain or wind.